Cet article peut contenir des liens d'affiliation. Nous pouvons gagner de l'argent ou des produits auprès des entreprises mentionnées dans cet article.
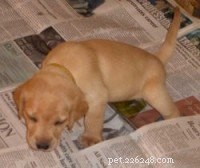
 © Depositphotos.com/jeanro
 Je pense que vous serez d'accord avec moi quand je dis :
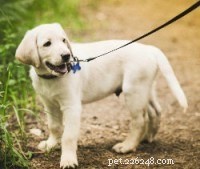
L'une des premières et des plus importantes choses que vous devez apprendre en tant que nouveau propriétaire est comment dresser un chiot à l'intérieur… et rapidement !
Eh bien, il s'avère que vous pouvez réduire considérablement le temps nécessaire à l'apprentissage de la propreté de votre chiot, en passant beaucoup plus tôt à l'époque où les sols et les tapis étaient plus propres, en vous armant d'un peu de connaissances et en suivant un plan bien établi.
Et dans cet article, je vous donne une méthode détaillée, étape par étape, à suivre pour que votre niche soit formée le plus rapidement possible, avec le moins d'accidents, de dégâts et de nettoyage en cours de route.
Je ne promets aucune « pilule magique ' ou 'secret de formation maison ‘ Cela permettra à votre maison pour chiots d’être formée dans une semaine. Aucun secret de ce type n'existe et le temps nécessaire varie d'un chiot à l'autre et d'un propriétaire à l'autre.
Mais ce que je propose est un guide complet, rédigé à partir d'innombrables heures de recherche et de ma propre expérience de formation en maison, qui m'a appris ce qui fonctionne et ce qui ne fonctionne pas.
Si vous suivez ce guide avec patience, cohérence et dévouement, je peux vous garantir que vous ferez passer votre chiot et vous-même du statut de débutant complet à celui des as de l'entraînement à domicile aussi rapidement et sans stress que possible.
CONSEIL RAPIDE : Pour contribuer à réduire le nombre d’accidents dans votre maison, vous devez vous assurer d’éliminer complètement l’odeur d’urine. Nous recommandons un nettoyant enzymatique comme Puppy In Training Stain &Odor Eliminator.
‘Comment dresser un chiot à la maison ' est le 11ème article de ma série ' Guide ultime de la formation en maison '.
Les 10 articles précédents contiennent une multitude d'informations complémentaires qui répondent à bon nombre des questions les plus courantes sur l'apprentissage de la propreté et vous fournissent les connaissances nécessaires pour prendre des décisions éclairées sur la méthode et le style d'apprentissage de la propreté que vous suivrez.
Cependant, j'ai volontairement créé ce mode d'emploi ' guide aussi complet et autonome que possible, la lecture des articles précédents n'est donc pas indispensable.
Je répète ici les informations les plus importantes avec moins de détails, puis je crée un lien vers ces articles si vous souhaitez une lecture plus détaillée et une compréhension plus approfondie.
Pour utiliser ce guide, je vous recommande de le lire une fois dans son intégralité, du début à la fin, vous aurez alors couvert tout ce que vous devez savoir pour réussir à éduquer un chiot à la maison.
Je vous préviens, cet article est long. Très longtemps. La lecture vous prendra probablement 15 minutes. Mais ce que vous apprendrez, la meilleure façon d'éduquer un chiot le plus rapidement possible, vous remboursera le temps investi des centaines de fois au cours des premières semaines et des premiers mois avec votre chiot.
Et si vous ajoutez ce guide à vos favoris, vous pouvez l'utiliser comme référence en cliquant dans la table des matières ci-dessus pour vous diriger directement vers n'importe quelle section si vous avez besoin de vous rafraîchir la mémoire sur un sujet particulier.
Alors commençons…
RECOMMANDATION RAPIDE : Un autre outil que nous aimons pour l’entraînement à la maison est la sonnette pour chien, Smart Bell. Cela demande un peu d'entraînement, la Smart Bell vous avertit lorsque votre chiot doit aller au pot et elle est également idéale lorsque vous travaillez sur le signal « Touch ».
À l'âge de 8 semaines, un chiot ne sait rien de mieux que de faire pipi ou faire caca partout où il se trouve lorsque l'envie se fait sentir.
Ils ne savent pas que ce n'est pas ainsi que cela est censé être fait ou que vous ne trouvez pas acceptable de faire du pot sur vos tapis.
C'est à vous de choisir un endroit approprié pour les toilettes, d'apprendre à votre chiot à l'utiliser et en même temps de lui apprendre qu'il n'est pas acceptable de faire ses besoins ailleurs dans votre maison.
Pour y parvenir il y a 2 clés essentielles à la réussite. 2 clés qui sont le but ultime de toute méthode ou technique que vous rencontrerez :
Pour y parvenir, une grande partie consiste simplement à emmener souvent votre chiot à son emplacement de toilette désigné.
De cette façon, vous obtenez le plus grand nombre d’occasions de les féliciter d’avoir fait la bonne chose. Et comme ils sont vides, vous réduisez également leur besoin de faire pipi lorsqu'ils se trouvent au mauvais endroit.
Mais ce n’est pas aussi simple que cela. Vous devez également éviter les erreurs dans votre maison grâce à un mélange de confinement et de surveillance concentrée. Et adaptez cette tâche 24h/24 et 7j/7 à votre style de vie et à vos routines actuels.
Pour ce faire, c'est à la fois un art et une science, qui nécessite une approche bien pensée et très planifiée pour donner à votre chiot la plus grande chance possible de faire la bonne chose, tout en limitant les possibilités de faire la mauvaise chose.
Et ce guide vous montrera exactement comment.
Combien de temps un chiot peut-il tenir sa vessie ? Combien de fois un chiot doit-il faire ses besoins chaque jour ? Combien de temps faudra-t-il pour que votre chiot soit complètement habitué à la maison ?
Un propriétaire se posera de nombreuses questions lorsqu'il débutera une formation en maison et de nombreuses informations erronées circulent.
Donc, pour répondre aux questions les plus fréquemment posées, j'ai écrit l'article suivant : Besoin de base de connaître les faits avant de commencer.
Je vous recommande de lire cet article afin d'avoir des attentes réalistes envers votre chiot et vous-même, pour savoir ce que vous pouvez accomplir tous les deux dans quel laps de temps.
 © Depositphotos.com / nasirkhan
 Parce que votre chiot n'a aucune idée de ce que vous lui demandez de faire ni pourquoi, vous êtes la partie la plus importante du processus d'apprentissage de la maison.
C'est à vous de leur apprendre des habitudes de toilette acceptables et vous devez le faire d'une manière aussi facile à comprendre et sans stress que possible.
La façon dont vous abordez les choses aura un effet dramatique sur la façon dont les choses se dérouleront, à tel point que j'ai consacré un article entier à la question : L'état d'esprit et l'approche que vous devez adopter en matière de formation en interne.
Dans cet article, je discute des méthodes traditionnelles qui ne devraient jamais être utilisées, pourquoi elles ne devraient pas être utilisées et ce que vous devriez faire à la place.
J'explique comment vous devez assumer le rôle de guide et de formateur, être patient et compréhensif, mais ferme et cohérent.
J'explique comment travailler avec les instincts naturels de votre chiot, la meilleure façon de gérer les accidents à la maison et comment l'apprentissage de la propreté jette les bases de votre future relation ensemble.
C'est une lecture importante pour quiconque s'apprête à se lancer dans un programme de formation en maison, je vous recommande donc de le lire avant de continuer avec ce guide.
Restreindre l'accès de votre chiot à votre maison jusqu'à ce qu'on puisse lui faire confiance est l'une des meilleures choses que vous puissiez faire pour un chemin plus rapide et plus propre vers le succès.
Les chiens ont l’instinct de ne pas éliminer à l’intérieur de leur tanière, l’endroit où ils mangent et dorment. Votre tâche consiste à convaincre votre chiot que toute la maison est sa tanière et qu'il ne doit pas se salir à l'intérieur.
C'est beaucoup plus facile à faire si vous limitez initialement votre chiot à une seule pièce de votre maison, si vous le convainquez d'abord de la garder propre, puis si vous élargissez progressivement les zones dans lesquelles il est autorisé.
Les chiens ne généralisent pas bien, donc même s'ils savent qu'ils ne sont pas censés faire leurs besoins dans votre cuisine, ils ne prendront pas cette idée pour l'appliquer à votre chambre.
Vous devez leur apprendre à ne pas faire de pot dans votre chambre, presque comme une idée distincte.
Si vous autorisez immédiatement l'accès à toute votre maison, votre chiot ne la verra pas comme un seul grand endroit, mais comme de nombreux endroits séparés et entièrement différents.
Mais si vous commencez petit, que vous les limitez et que vous les entraînez à la propreté dans une zone, puis que vous vous développez petit à petit, il est plus facile pour votre chiot d'associer la nouvelle zone à son espace de vie qu'il est censé garder propre.
Cela accélérera le processus de cambriolage tout en réduisant le nombre d’accidents que votre chiot aura et le nombre de nettoyages en profondeur que vous devrez effectuer. Une situation gagnante pour tout le monde !
 © Depositphotos.com/tairen10
 Voici une liste d'articles et de produits dont vous aurez besoin pour vous aider à apprendre à votre chiot à aller à la propreté.
Certains sont essentiels, d'autres sont facultatifs et ce dont vous avez besoin dépendra de la méthode que vous choisissez.
Vous serez en mesure de déterminer ce dont vous avez besoin une fois que vous aurez terminé le guide et connaître votre plan d'action.
Si vous souhaitez une description détaillée de comment et pourquoi ces éléments sont si utiles, comment chacun doit être utilisé et comment ils aident lors de l'entraînement à domicile, veuillez consulter mon article :
Produits, fournitures et équipements dont vous avez besoin pour la formation en maison
 © Depositphotos.com/belchonock
 Ce que vous nourrissez et la façon dont vous nourrissez votre chiot a un impact incroyable sur le processus.
J'ai écrit un article détaillé sur la façon dont les choix alimentaires font une énorme différence lors de l'entraînement à la maison, que vous pouvez lire ici en cliquant ici.
Vous y trouverez une discussion détaillée de l'influence que vos choix alimentaires auront sur votre réussite et de nombreux conseils sur la façon de nourrir votre chiot.
Bien sûr, je vous recommande fortement de le lire, vous pourrez ensuite revenir informé et sauter cette section pour la suivante. Mais pour ceux qui manquent de temps, les principaux points de l'article sont les suivants :
Les aliments de mauvaise qualité regorgent d'éléments de remplissage bon marché, ont une faible valeur nutritionnelle et sont difficiles à digérer, ce qui entraîne davantage de passages.
Alors que les aliments de haute qualité sont riches en nutriments, faciles à digérer et une plus grande quantité est absorbée, ce qui signifie moins de passage.
Par conséquent, une nourriture de haute qualité permet à votre chien de produire moins de selles chaque jour, ce qui est évidemment idéal lors de l'entraînement à la maison.
Parce qu'un chiot extrait plus de nutriments d'aliments de haute qualité et que moins de charges bon marché s'écoulent directement, ses selles sont plus fermes, ce qui l'aide à apprendre à contrôler ses intestins.
Étant donné que la nourriture circule dans le système de votre chiot à un rythme raisonnablement constant, si vous le nourrissez aux mêmes heures chaque jour, il adoptera une routine d'élimination aux mêmes heures chaque jour.
Vous pouvez ensuite baser un programme autour de ces heures, votre chiot apprendra à s'attendre à une pause toilette à ces heures et l'apprentissage de la propreté deviendra plus facile pour vous deux.
 © Depositphotos.com / lifeonwhite
 Si, au lieu de respecter des horaires d'alimentation stricts, vous laissez de la nourriture à votre chiot toute la journée, il risque de picorer et de manger sa nourriture à des heures aléatoires.
C'est ce qu'on appelle « l'alimentation gratuite » et c'est la pire chose que vous puissiez faire jusqu'à ce que votre chiot connaisse les habitudes de toilette appropriées.
En mangeant à des heures aléatoires, ils devront également faire caca à des heures aléatoires.
En l'absence de schéma régulier et prévisible quant au moment où votre chiot a besoin de faire caca, l'apprentissage de la propreté sera plus difficile.
Par conséquent, faites manger à votre chiot selon un horaire et récupérez son bol de nourriture entre les repas, qu'il soit vidé ou non.
Des changements drastiques d'alimentation entraînent très souvent des selles molles ou de la diarrhée, votre chiot devient physiquement incapable de les retenir et c'est la pire chose qui puisse arriver lors de l'apprentissage de la propreté (sans parler de tout le ménage que vous devrez faire ! )
Choisissez une marque unique de nourriture pour chiots de haute qualité et équilibrée sur le plan nutritionnel et respectez-la. Celui utilisé par l'éleveur de votre chiot est généralement le meilleur choix afin que votre chiot n'ait pas à subir de changement.
Si vous devez choisir une nouvelle marque de nourriture ou si vous envisagez de passer à quelque chose de mieux, nous avons répertorié ici certains des meilleurs aliments pour chiots Labrador et grands chiens (s'ouvre dans une nouvelle fenêtre).
Vous devez mettre de l'eau gratuitement à la disposition de votre chiot tout au long de la journée, surveiller sa consommation afin de pouvoir juger s'il en consomme trop ou pas assez, mais ne restreignez pas l'accès car ses besoins peuvent varier.
La chose importante à faire est de leur retirer l'accès à l'eau pendant les 2 dernières heures avant de se coucher, sinon ils devront y aller plusieurs fois dans la nuit, ce que vous ne voulez bien sûr pas.
Les chiens sont attirés vers certains endroits par l'odeur de leur propre urine et utilisent encore et encore le même endroit comme toilettes.
Et leur odorat est si développé que même la plus petite trace d'urine suffit à encourager une répétition de la performance.
C’est pourquoi après chaque accident, il est essentiel de nettoyer minutieusement la zone, en éliminant toute trace d’urine et son odeur. Si vous ne le faites pas, il y a de très fortes chances que votre chiot fasse une autre petite flaque d'eau.
Cela peut ruiner vos efforts, car les encourager à faire leurs besoins à l'intérieur de votre maison est exactement le contraire de ce que vous essayez d'accomplir.
Les nettoyants ménagers ordinaires ne parviennent tout simplement pas à éliminer suffisamment les odeurs, vous devez donc vraiment utiliser un détachant et un nettoyant anti-odeurs spécialement conçus à cet effet.
Et vous avez besoin d'une méthode étape par étape à suivre qui garantit des résultats.
Pour des conseils sur les produits de nettoyage à choisir, ceux que vous devez simplement éviter, comment trouver des taches d'urine cachées (avec une lumière UV) et un processus étape par étape pour un nettoyage rapide et en profondeur, veuillez consulter mon article :
Des accidents surviennent :comment éliminer les taches et les odeurs d'animaux.
Avant de commencer l’apprentissage de la propreté, vous devez prendre une décision très importante :votre chien aura-t-il un coin toilette à l’extérieur, à l’intérieur, ou peut-être même les deux ? Et comment devriez-vous décider ?
Mon conseil est le suivant :Choisissez un emplacement de salle de bain extérieur, sauf si vous avez une très bonne raison de faire autrement.
Entraîner un chien à aller aux toilettes exclusivement à l'extérieur est plus facile à comprendre pour votre chiot, plus facile à dresser pour vous et plus doux pour votre nez.
Mais si vous avez des problèmes de mobilité ou si vous vivez au dernier étage d'un immeuble de grande hauteur, il est impossible de sortir rapidement.
Ensuite, vous devez choisir un endroit pour les toilettes à l'intérieur de votre maison, au moins jusqu'à ce que votre chiot ait développé un bon contrôle de sa vessie.
Vous pouvez choisir un mélange des deux en faisant faire aux toilettes de votre chien à l'extérieur lorsque vous êtes là, mais à l'intérieur sur des tampons ou du papier lorsque vous n'y êtes pas.
Cela convient si vous devez travailler toute la journée ou si vous devez occasionnellement laisser votre chien seul pendant plusieurs heures.
C'est une bonne idée d'« entraîner sur papier » votre chiot à faire ses toilettes à l'intérieur lorsqu'il se trouve dans sa zone de confinement, même si votre plan final est qu'il ne fasse ses toilettes qu'à l'extérieur.
En effet, selon l'âge du chiot, il lui est physiquement impossible de tenir sa vessie pendant plus de quelques heures jusqu'à ce qu'il grandisse.
Personnellement, j’ai toujours constaté avec chaque chien que j’ai possédé qu’il y avait toujours des moments où je devais les laisser seuls pendant 3, 4, peut-être 5 heures. J'ai prévu que cela n'arrive pas, mais cela arrive parfois.
Vous ne pouvez pas mettre un chiot en cage pendant cette période, vous devez donc avoir un plan de secours. Et cela consiste à les confiner dans un enclos d'exercice ou dans une seule petite pièce avec un espace tapissé pour qu'ils puissent faire leur pot.
Ainsi, même si à la maison, je suis vigilant et j'entraîne très activement mon chiot à faire ses besoins à l'extérieur, je dois également l'entraîner sur papier pour les rares occasions où je ne suis pas à la maison.
Après avoir discuté avec de nombreux amis et propriétaires, je sais que c'est un scénario courant pour beaucoup.
De nombreuses personnes permettent à leurs chiens d’utiliser toute leur cour comme toilettes, à condition qu’elles soient à l’extérieur. Mais vous pourriez envisager de les entraîner à utiliser un seul endroit spécifique à chaque fois.
S'ils sont autorisés à aller n'importe où dans la cour, il est fort probable que vous ne puissiez pas trouver et ramasser tous leurs excréments, ce qui n'est pas une bonne chose si vous avez des enfants qui jouent là-bas, ou si des chiots « déposent » autour de votre belle chaise longue.
Vous constaterez peut-être également que l'urine de votre chien provoque des « brûlures de pelouse », lorsque l'herbe devient brune dans les zones régulièrement utilisées de votre pelouse.
De plus, s’ils font régulièrement pipi près d’une porte ou sous une fenêtre, cela peut provoquer une odeur nauséabonde dans votre maison, surtout en été. Mais…
Si vous les entraînez à utiliser un seul endroit, votre jardin sera plus propre et plus hygiénique pour tous les autres utilisateurs, vous n'aurez pas le problème de l'herbe brûlée par l'azote et il vous sera tellement plus facile de garder votre jardin propre.
Il est donc tout à fait logique d'entraîner votre chien à utiliser une zone spécifique à chaque fois.
Un espace éloigné de toute porte, fenêtre, barbecue ou aire de jeux. Mais s'il vous plaît, ne pensez pas que si vous choisissez un endroit « à l'écart », vous pourrez vous soustraire aux tâches de nettoyage.
Les chiens aiment aller là où ils peuvent sentir qu’ils sont allés auparavant, mais cela doit quand même être propre. Donc, si vous voulez qu'ils continuent à utiliser un seul endroit, vous devez toujours ramasser ce que vous pouvez et nettoyer régulièrement la zone.
Lorsque vous choisissez un pot intérieur, la première chose que vous devez garder à l'esprit est que vous devez vivre avec l'odeur.
En raison du manque d’espace, cela n’est pas toujours possible, mais vous devriez essayer d’éviter les endroits tels que les chambres à coucher, les zones où les enfants jouent ou tout endroit où vous préparez ou stockez de la nourriture. Cela ne laisse pas beaucoup d'options !
Les endroits idéaux sont n'importe quelle pièce peu utilisée :une pièce libre, la buanderie ou une salle de bain peu utilisée.
Une autre considération est la surface sur laquelle vous placez la salle de bain de votre chien. Pour les toilettes intérieures utilisant des chiens, il y aura toujours un risque d'accident et de raté.
Donc, si vous le pouvez, placez la salle de bain de votre chiot sur un sol carrelé ou en linoléum. Ou s'il doit s'agir d'une zone recouverte de moquette, posez une feuille de plastique sous les toilettes pour protéger votre sol et faciliter le nettoyage.
Il existe de nombreuses options parmi lesquelles choisir pour l’utiliser comme pot intérieur. Bacs à gazon, bacs à litière, certains nouveaux disposent même d'un système de drainage qui collecte les déchets dans des réservoirs de stockage… la liste est désormais presque interminable.
Alors, lequel choisir ?
Personnellement, j'entraîne toujours mes chiens à faire la propreté à l'extérieur et je ne leur fournis pas de toilettes intérieures permanentes.
Par conséquent, je n'ai jamais envisagé de bacs à gazon ou de bacs à litière, choisissant plutôt d'utiliser du papier et des coussinets pour chiots si je dois les laisser seuls à la maison plus longtemps qu'ils ne peuvent retenir leur vessie.
Mais si vous devez faire un choix :Quels sont les avantages et les inconvénients de chacun ?
[amazon field=”B01MPWFYZA” value=”thumb” image_size=”large” tracking_id=”labradortraininghq-20″ image_class=”ais200fr”] Les coussinets pour chiots sont très absorbants et peuvent être placés dans un plateau avec des bords surélevés, réduisant ainsi les déversements et rendant le nettoyage relativement facile.
Ils sont souvent imprégnés d’un parfum pour attirer un chiot à les éliminer afin de pouvoir accélérer un peu le processus d’apprentissage de la maison. Ils sont également plus beaux à la maison qu'une zone recouverte de papier (légèrement).
L'inconvénient est qu'ils ne couvrent pas une zone aussi large que le papier et j'ai entendu des histoires de chiens qui apprennent à aimer les déchiqueter en morceaux, mais c'est vrai pour la plupart des choses, je suppose !

Le papier est très bon marché et si vous utilisez de vieux journaux, il est presque gratuit ! Vous pouvez ainsi couvrir une vaste zone à très faible coût pendant que votre chiot est jeune et inexpérimenté.
Cependant, l'urine s'écoule souvent du papier avant d'y pénétrer, les déversements sont donc plus fréquents et le nettoyage plus difficile. De plus, nous pouvons plus facilement faire tremper le papier jusqu'au sol, mais vous pouvez utiliser un plateau comme celui des coussinets pour chiots si vous le souhaitez.
Enfin, il est très facile pour votre chiot de déchirer le papier et de l'étaler là où un tampon est plus contenu lorsqu'il est coincé dans un plateau.
[amazon field=”B00G7RMCHO” value=”thumb” image_size=”large” tracking_id=”labradortraininghq-20″ image_class=”ais200fr”] Un bac à litière est facile à nettoyer avec une litière très absorbante qui absorbe les déchets et les côtés hauts du bac font un bon travail pour garder tout contenu. Cela a également une meilleure apparence qu'une série de journaux.
Mais le principal problème avec la litière est que certains chiens la voient comme une collation, elle peut être sortie du bac et piétinée dans la maison lorsqu'elle est collée à leurs pattes et Dieu nous préserve que vous ayez un chien qui essaie d'enterrer ses déchets !
[amazon field=”B002DCWA4C” value=”thumb” image=”2″ image_size=”large” tracking_id=”labradortraininghq-20″ image_class=”ais200fl”] Les boîtes à gazon sont disponibles avec des options de gazon véritable ou synthétique.
Ils fonctionnent bien car ils sont si différents du sol environnant qu'un chiot peut facilement le distinguer comme un pot, votre chien ressent une sensation douce et herbeuse sous ses pieds et ils font un bon travail pour garder tout contenu.
L'inconvénient est qu'ils sont les plus chers des options disponibles et certains chiens prennent l'habitude d'essayer de creuser et de mâcher dans le bac à gazon comme ils le feraient avec un peu d'herbe extérieure.
Je recommande d'utiliser des journaux avec un très jeune chiot, confiné dans une seule pièce avec un sol facile à nettoyer.
Une fois que votre chiot est habitué à utiliser le papier, coupez la zone couverte à la taille de quelques feuilles seulement, puis placez des coussinets pour chiots dans un plateau au-dessus du papier et encouragez votre chiot à l'utiliser.
Le papier est si bon marché que vous pouvez l'utiliser en abondance avec un nouveau chiot jusqu'à ce qu'il soit au moins à moitié dressé, puis passer aux tampons pour chiots afin que la tâche de nettoyage soit plus facile.
Si vous avez seulement besoin d'utiliser un pot intérieur avec votre très jeune chiot jusqu'à ce qu'il grandisse, d'apprendre à contrôler sa vessie et d'utiliser ensuite l'extérieur exclusivement, je n'envisagerais jamais un bac ou un plateau en gazon.
Mais si vous avez l'intention d'utiliser une salle de bain intérieure à long terme, vous pourriez envisager d'envisager des bacs à gazon, des bacs à litière ou même l'une des toilettes intérieures les plus modernes et créatives disponibles.
Il existe des toilettes modernes pour chiens qui ne nécessitent qu'un nettoyage hebdomadaire, certaines qui éliminent les odeurs et beaucoup qui sont plus belles que le papier ou les coussinets pour chiots en tant qu'élément permanent d'une maison, vous voudrez peut-être rechercher certaines de ces options.
Il existe 4 méthodes largement utilisées et recommandées parmi lesquelles vous pouvez choisir, même si la réalité est que vous en utiliserez presque certainement un mélange de 2 ou plus.
Ces méthodes sont :
Dans le reste de ce guide, je ferai référence à chacune de ces 4 méthodes et aux moments où vous devriez ou pourriez les utiliser.
Pour être sûr que vous comprenez bien ce qu'est chaque méthode et ce qu'elle implique, je vais donner un bref résumé de chacune.
Je créerai également un lien vers des articles plus détaillés que j'ai écrits sur chaque méthode pour ceux qui souhaitent une compréhension plus détaillée.
 © Depositphotos.com/agencyby
 La formation sur papier est la méthode la plus connue et la plus utilisée pour la formation en interne dans le monde entier.
Voici un bref résumé de la technique :
Description : L'entraînement au papier consiste à apprendre à votre chiot à faire ses besoins à l'intérieur sur une large zone de journaux ou de tampons prétraités pour chiots qui encouragent un chiot à utiliser l'espace comme salle de bain.
Une fois habitué à utiliser le papier ou les blocs, vous coupez lentement la zone couverte jusqu'à ce qu'ils n'utilisent que quelques feuilles de manière fiable et ne manquent jamais.
Vous déplacez ensuite lentement le papier vers l'extérieur où un autre ensemble est placé et vous commencez à encourager votre chiot à sortir uniquement, avant de retirer complètement les papiers à l'intérieur. À ce stade, ils auront fait la transition.
Un conseil important lors de la formation sur le papier est que lorsque vous nettoyez le papier sale, vous devez retenir un morceau et le placer comme couche intermédiaire des nouveaux papiers.
Les coussinets pour chiots ont un parfum qui attire un chiot, pas le papier.
Mais en gardant un morceau de papier légèrement sale avec l'odeur de l'urine de votre chiot, vous obtenez le même effet d'attirer votre chiot pour l'éliminer là où vous le souhaitez.
Efficacité : Sur une échelle de 1 à 5, je lui donne un 3.
Il ne peut pas obtenir un score plus élevé parce que vous les entraînez à faire leurs besoins à l’intérieur avant de les entraîner à ne pas le faire ! Cela prête à confusion et rendra le processus d'apprentissage plus long.
Cela conduit également à des erreurs (faire du pot à l'intérieur) qui sont commises bien plus tard dans la vie d'un chiot par rapport aux autres méthodes, en particulier lorsqu'il voit du papier laissé traîner.
Convient parfaitement à : Soit les personnes qui disposeront d'une salle de bains intérieure à long terme, soit les personnes qui n'utiliseront pas de cage pour l'entraînement mais ne peuvent pas s'engager à surveiller constamment leur chiot à l'intérieur de la maison.
Mais c'est aussi un bon plan de secours que tout le monde peut utiliser pour les moments où ils doivent laisser leur chiot seul à la maison plus longtemps qu'il ne peut tenir sa vessie.
Facilité d'utilisation : Sur une échelle de 1 à 5, certainement un 5.
C'est une méthode très simple à utiliser, qui nécessite le moins d'effort de votre part par rapport à toute autre technique.
Mais cela entraîne davantage d’erreurs de la part de votre chiot jusqu’à plus tard dans la vie. Vous pouvez donc être plus passif et moins impliqué au début, mais vous aurez plus de nettoyage à faire plus tard dans la vie de votre chiot par rapport à d'autres méthodes.
Équipement nécessaire : Rien que des piles de vieux journaux ! Une méthode très rentable.
Plus d'informations : Pour une discussion détaillée sur la formation sur papier, les avantages, les inconvénients et quelques conseils d'experts, veuillez consulter l'article suivant : Comment dresser votre chiot ou votre chien sur papier en toute simplicité
[amazon field=”B001DRY8Z2″ value=”thumb” image_size=”large” tracking_id=”labradortraininghq-20″ image_class=”ais200fl”] L'utilisation d'une caisse est le moyen le plus efficace et le plus simple d'accélérer le processus de formation à la maison.
Description : La méthode tire parti du fait que les chiens ont un instinct naturel de ne pas salir la zone où ils mangent et dorment.
La clé est de rendre la caisse juste assez grande pour pouvoir y tenir, se retourner facilement et s'allonger, mais pas plus grande.
Un chiot ou un chien le « tiendra » alors aussi longtemps que possible pour éviter de faire ses besoins et devra ensuite s'y coucher.
Un énorme avantage est qu’un chiot apprend très jeune que, simplement parce qu’il a envie de faire pipi ou de faire caca, il n’est pas obligé de le faire et peut réellement le retenir. Avec d'autres méthodes, un chiot n'apprend pas ce fait lorsqu'il est si jeune.
Cependant, vous ne mettez pas votre chiot en cage tout le temps, ce serait cruel.
Vous ne les mettez en caisse que lorsque vous ne pouvez pas les regarder, que vous êtes occupé à la maison ou peut-être absent pendant une courte période. Le reste du temps, vous les surveillez et les emmenez régulièrement dehors au pot pour leur apprendre de bonnes habitudes.
Efficacité : Sur une échelle de 1 à 5, je lui donne un 5
Je dis que c’est la méthode la plus efficace que je connaisse ou que j’ai jamais entendue. Les chiots apprennent le comportement correct plus rapidement qu'avec toute autre technique et il y a moins d'erreurs (et moins de nettoyage !) en cours de route.
Convient parfaitement à : Tout le monde ! Je recommande fortement d'utiliser une caisse pendant le processus de formation à la maison car elle est très efficace.
Facilité d'utilisation : Sur une échelle de 1 à 5, je dirais un 3.
C’est plus facile qu’une supervision constante, plus difficile qu’une formation sur papier. En effet, vous devrez dresser votre chiot en cage avant de pouvoir utiliser une cage pour le dressage à la maison, ce qui demande du temps et des efforts.
Cliquez ici pour accéder à mon guide gratuit et détaillé sur la formation en cage de votre chiot.
Équipement nécessaire : Une caisse adaptée. J'ai un guide pour vous aider à sélectionner la bonne taille et le bon type que vous pouvez lire en cliquant ici.
Plus d'informations : Pour lire une discussion détaillée sur l'utilisation d'une cage pour l'entraînement à la maison, veuillez lire :Comment utiliser une caisse pour dresser un chiot à la maison
Cet article explique pourquoi la méthode est si efficace, comment elle tire parti de 3 instincts naturels de votre chiot, pèse le pour et le contre et bien plus encore.
 © Depositphotos.com/agencyby
 Description : C'est comme ça que cela semble :vous passez tout votre temps avec votre chiot, le surveillant constamment.
Chaque fois que vous repérez des signes indiquant qu'ils sont sur le point d'aller aux toilettes, vous les ramassez et les emmenez à leur salle de bain.
Efficacité : Sur une échelle de 1 à 5, je lui donne provisoirement un 3.
Il peut en fait obtenir un score plus élevé ou plus faible en fonction de votre engagement et de votre réussite dans la supervision de votre chiot.
Mais je lui ai donné un 3 car peu importe vos bonnes intentions, peu importe à quel point vous êtes attentif à la tâche de surveillance, vous baisserez votre garde et votre chiot pourra se faufiler pour faire des erreurs.
Pour cette raison, ce n'est pas aussi efficace que l'entraînement en cage et prendra plus de temps, ce qui entraînera certainement davantage d'« accidents » en cours de route.
Convient parfaitement à : Des personnes qui s'opposent à tout type de confinement et qui peuvent rester à la maison pour surveiller leur chiot toute la journée, tous les jours. Principalement des personnes qui travaillent à domicile et des retraités.
Mais cette méthode fait également partie de chaque plan de formation à domicile, que vous utilisiez ou non d’autres méthodes. En effet, lorsqu'un chiot est en liberté à l'intérieur d'une maison, il DOIT be closely supervised to prevent any mistakes.
Ease of use: On a scale of 1 to 5, I give it a 2.
It scores low as it requires a lot of input from you as the owner. You need to concentrate on your puppy at all times, ready to intervene and correct them any time they’re about to potty where they shouldn’t.
It is quite draining never being able to take your eye of your puppy.
Equipment needed: None. Rien. Not a crate, newspapers, puppy pads or anything. The cheapest of all the methods…unless you put a price on your time.
Further Info: For more information on the constant supervision technique, please read the following article:House Training WITHOUT A Crate:Constant Supervision
 © Depositphotos.com / andresr
 This is a little used technique, and at first may sound a little silly. But it is highly effective.
Description: This technique calls for you to tether your puppy to you by leash and have them follow you wherever you go when inside your home.
This way they’re never more than a few feet away and have no chance to sneak off unnoticed to potty where they shouldn’t.
You will notice and be able to intervene and correct every possible mistake, taking them outside every time they need to relieve themselves.
Effectiveness: On a scale of 1 to 5, I’d say it’s a 5.
Used correctly, the opportunity for your puppy to make mistakes is completely removed so every single time they need to visit their bathroom spot is a training opportunity you will take advantage of and no mistake goes uncorrected.
Best suited to: People who spend all their time at home with their puppy and would also enjoy literally being tied to their pup all day.
It’s also a good method to throw into the mix for people who’ve found difficulty with ‘constant supervision’ and allow their puppy to sneak off and have accidents in the home, helping them to get better results.
Ease of use: On a scale of 1 to 5, I’d say a 4.
It’s easier than constant supervision as your puppy is attached so you can relax a little in comparison.
It’s easier than using a crate because you don’t have to crate train your puppy. But it’s not as easy as paper training which is very hands off for an owner.
Equipment needed: A quick release collar and a house line / leash.
Further Info: for a detailed discussion of this technique, the benefits, downside, and many more tips, please see my article:Umbilical Cord House Training:What is It? How Does It Work?
I use and recommend a mixture of crate training, constant supervision and paper training.
I primarily use crate training as I firmly believe it’s the most effective method and I’m also a strong believer in the idea that every dog deserves to be crate trained to enjoy the continuous benefits it offers throughout their life.
I use constant supervision extensively because when a puppy is outside of the crate you have to watch them diligently to avoid puppy mistakes.
I use paper training while my puppies have almost zero bladder control until the age of 10 or 11 weeks, and later in life when I can’t avoid leaving them home alone for longer than they can be expected to hold their bladder.
Admittedly this is somewhat going against my advice because I always recommend to avoid paper training if possible.
It encourages or allows your puppy to toilet inside the home, before then training them not to do so. It’s saying it’s OK, before turning full circle and saying that it’s not.
This is confusing to your puppy and harmful to our house training efforts. (Unless you’re going to have a permanent indoor bathroom spot of course, then this method is perfect.)
But even though I recommend against it, using paper training ever so occasionally as a fall back plan works well for me.
I explain more fully why and when I use paper training in later sections of this article on ‘House Training For Full Time Workers ‘, and ‘A Note On Puppies Between 8 And 12 Weeks ‘
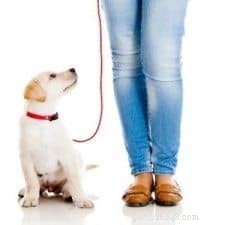
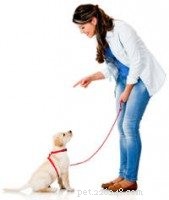 © Depositphotos.com / andresr
 Though not essential, it’s extremely useful to train your dog to eliminate on command.
When you’re in a hurry and need to leave in the morning, or it’s right before bed time, these are times you will wish your dog would eliminate on command rather than you having to patiently wait for them to do their job.
Most dogs love being outside and will use any excuse to get out there and stay there.
So it’s of benefit if you can clearly tell them you’re going outside to toilet only and for nothing else, that there’s no chance of exercise or play. If they don’t potty, they’re coming straight back in.
You do this by using a cue word and walking them on leash to their potty spot, not allowing them to do anything else and if they do not potty, taking them back inside and trying again in a few minutes.
Because a full bladder or bowel is uncomfortable, dogs are happy to relieve themselves, but some may try to hold it if they think they can get to stay outside and sniff around a while.
By not allowing this and associating it with a consistent command, it will only take a few short weeks for them to learn your chosen command means a bathroom break only and that if they don’t go, they’re coming straight back inside uncomfortably full.
If this is something you’d like to train, it’s important that you choose the words to use before you start the training and make sure everybody uses the same words consistently.
If people use different words, your dog will get confused.
So pick a command like ‘toilet time ‘ that you will only use when you’re taking them to the bathroom and you will not allow them to do anything else.
You’ll have a different word like ‘walkies ‘ for other more fun times outside and your dog will eventually learn the difference and set their expectations of their time outside accordingly.
Once outside you can use another command like ‘potty’ or ‘do your job’ to ask them to do their business.
For the first weeks you should wait for them to start doing their business and then use the word ‘potty’ to build an association. And praise them afterwards with ‘good potty’. This will slowly teach them the command.
Eventually your dog will learn ‘toilet time’ means a quick bathroom break only, and ‘potty’ is you asking them to go.
REMARQUE : For a very good guide on training to eliminate on command from the ‘Whole Dog Journal’, please click here.
A quick word of caution: Don’t use a word for your elimination command that gets used at other times. For instance, many people use the words ‘hurry up!’, but if you say this to your spouse when heading late out the door, this could get very messy if your dog hears and reacts.
When your puppy’s very young it’s easy enough for you to scoop them up and carry them to their bathroom spot. And this is fine for the first couple of weeks while they have no bladder control and will perform their business very quickly.
But once they start to learn some bladder control, if you take them to potty without them being on leash, as soon as they hit the outside there’s all the sights, sounds and smells that can take over their inquisitive minds.
They easily forget what they’ve gone outside for and will romp and play in your yard instead, before going back inside still full. And some dogs even learn to actively hold their bladder just so they can stay outside to explore for longer.
So it’s in your best interests to lead them on leash to their bathroom spot and keep them there until they complete the job in hand.
Before you can do this you need to first get your puppy used to wearing a collar and leash. To help with this I’ve written a detailed guide that you can read by clicking here:How To Get Your Puppy Used To A Collar And Leash
Start this process at 10 weeks, and always lead them on leash from the 11th or 12th week. You may regret it with lots of time waiting outside if you don’t!
Like everything in life, house training runs smoother if you have everything ready before you start, hopefully before you even bring your puppy home. Although it’s never too late of course!
To help make sure you’re ready, here’s a checklist to cross off and make sure you have everything prepared. Have you:
With all this ready and in place, you’re now ready to begin house training your puppy.
Dogs thrive when living to schedules and routine, doing best when they have set times for eating, going to toilet, exercise, training and play.
And when it comes to house training, you’re going to love schedules and routine too!
If you feed your puppy at random times throughout the day, they’ll need to defecate at random times throughout the day.
They won’t fall into any predictable schedule and your life will be that much harder.
But because the passage of food through their digestive system stays roughly the same, if you feed your puppy at the same times every day they will need to defecate at roughly the same times every day.
Furthermore, because puppy’s learn through repetition, by taking yours out to potty at the same times every day, their body learns to expect and follow this schedule, training your puppy to toilet at the times you’d like them to.
When you know the times your puppy needs to eliminate you can have them at the right spot at the right time with a far greater success rate than if you didn’t follow a routine.
This results in fewer mistakes, more opportunities to praise your puppy for going in the right place and so speeds up their learning.
Depending on their age a puppy will need to poop 3 to 6 times a day, and wee many more times than that. Can these times be predicted? Mostly they can.
When a puppy needs to potty depends on when they last ate, drank and their recent activities. Mostly they need to go:
But a puppy also needs to go many times per day regardless of recent activities, so you should also take your puppy to their bathroom spot on a consistent schedule such as the following:
This is only a guideline because all puppy’s are different. And on that note…
Not all puppies are the same. Some will need to wee within 2 minutes of drinking, others after 20 minutes. Some will need a bathroom break within 2 minutes of waking, others 15 minutes later.
This means there isn’t a ‘one-size-fits-all’ schedule I can give that’s suitable for every puppy and owner. You have to determine your puppies own natural tendencies and create a schedule to suit.
This may sound like a lot of work but it really isn’t once you get in to the routine. And besides:
Once you’ve determined your puppy’s natural rhythms, you can be at the bathroom spot at the correct times more accurately which is of huge benefit to both you and your puppy, so it’s highly worth doing!
But if you fear living to strict schedules is too hard to do…don’t fear! You don’t have to stick to them 100% of the time.
The more you can stick to schedules and routines, the smoother and faster the process will be. But you can stray from the path when necessary and still find success, it will just take a little longer.
Just don’t be overly strict and hard on yourself because we all have a life to live outside of house training!
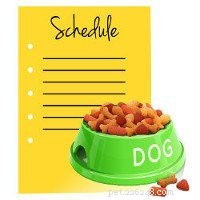
So let’s go through the 5 steps of creating your puppy’s schedule.
 © Depositphotos.com / zzve
 Follow this 5-step process to create a schedule that works with your puppy’s natural rhythms and fits with your lifestyle and commitments.
Keeping and following a written schedule may seem odd or a bit excessive, I’m sure you’ve not seen many people bother with it?
But I promise you it’s not much work, after a couple of days practice it becomes a simple routine, the time it takes is negligible and the results are phenomenal.
Depending on how old they are, your puppy needs feeding between 2 and 4 times a day. Here’s a guide to how often and when you should feed them:
You should feed your puppy 4 times a day until 12 weeks old.
To achieve this you need to feed them every 4 hours and you should make it the same time every day, fitting it into a schedule that’s best for you.
A good routine would be to feed ‘breakfast’ when you first get up, at 7:30AM, then at 11:30AM, 3:30PM and 7:30PM.
You should feed your puppy 3 times a day when 12 to 26 weeks old.
The timings for 3 feeds a day would be roughly every 6 hours:7:30AM, 1:30PM and 7:30PM.
From 26 weeks old and onwards, feed your puppy just two times a day
For 2 meals a day you need to space them out 8 to 12 hours apart.
What works for me is shortly after I get up at 7:30 and when we have our evening meal between 6:15PM and 6:45PM.
Availability Of Water:
You should make sure fresh water is always available but because drinking too much or too little can be a sign of health problems, you do need to monitor their water intake.
© Depositphotos.com / Madrabothair Physical activity has a direct influence on a puppy’s potty schedule because it ‘helps things move along’ for want of a better expression.
Physical activity often leads to a puppy needing to potty very soon after. So to encourage predictable potty times for your puppy, you want to schedule their exercise and play.
This will help your puppy’s mind and body to slip into a routine that will help you both with the house training process.
Deciding when to exercise, train and play with your puppy is entirely up to you. You should fit it around your lifestyle and commitments, but try to make it the same times each day if you can.
If you’ve followed the guide so far, you’ve now gathered all the information you need to design your puppy’s house training schedule.
Enter all the following details into a single column in an excel spreadsheet, or write them down as a day schedule with a pen and paper:
After writing down this schedule, tick off each task as you go through the day with your puppy.
This way you will always know what needs to be done and when, and there will be no confusion about whether someone else in the house fed, exercised or took the puppy to the loo.
If it’s not crossed off the schedule, it hasn’t been done.
 © Depositphotos.com / Gajus-Images
 Alongside the schedule you’ve designed, add some columns where you can take notes of your puppy’s bladder and bowel movements, as well as their daily activities.
You do this because it’s important information you can use to design an ever more accurate schedule going forward. (I discuss this further in step 5 below.)
The things you should write in your diary are:
Basically, note down anything food, activity, accident or potty related so you can look for patterns to help you in the next step.
Look over any ‘accidents’ your puppy had and you noted during the day.
You should be able to pick up on any patterns and adjust your own behavior to avoid mistakes in future.
Was puppy left alone and peed in the living room while you made breakfast? – You need to increase supervision or make doubly sure you crate them when you’re busy.
Puppy should never be left alone unsupervised, learn from this mistake.
Or maybe puppy peed in the crate after an hour? – You left them crated longer than they can hold their bladder, or didn’t empty them before crating.
Learn from this mistake.
Look over how long they took to potty after being taken for a scheduled potty break
Did you catch them ‘in the act’ 3 times in a single day? Well done for watching them closely enough.
However, if they tried to go 3 times in the home, you’ve learnt that you likely aren’t taking them to empty themselves often enough. So increase the frequency.
Or perhaps the opposite happened and you noted that 3 times in the day you took puppy for a scheduled bathroom break, they didn’t go and you returned them inside for 15 minutes before trying again?
This shows your puppy is maturing fast, doesn’t have to potty as often as you thought and can last longer between potty visits than you’re allowing.
Therefore you should stretch out the time between visits by 10 to 15 minutes for the following day.
Look over how long after eating they pooped
If you see puppy didn’t potty for 20, 15, 20 and 20 minutes after their meals of the day, with this information you learn it’s pointless to take them to their potty spot until 15 minutes after they finish eating.
Some puppy’s go 2 minutes after eating, some after half an hour. This is how you find out.
By writing out the schedule as in step 3, you should never forget to feed, train or take your puppy to potty. If it’s not marked off on the schedule, it’s not been done.
And by using the schedule as a diary as in step 5, you get feedback on how you and your puppy are performing, and are armed with the necessary info to make changes to your schedule over time.
This helps you to truly match your puppy’s natural rhythms and their maturing and changing body.
You, your puppy and their needs all stay in sync and house training becomes that much easier.
 © Depositphotos.com / ccaetano
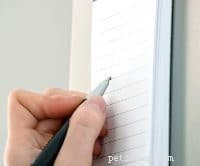
 For ease of use, I recommend simply keeping a written diary with good old-fashioned pen and paper.
We’re all in the electronic age surrounded by smart phones and i-Pads, but this is simply too much hassle and will likely lead to you not bothering if you have to power up a device and so on to make an entry.
Just make a spreadsheet in excel and print it out, or simply buy some lined paper.
Keep it somewhere you can always see and know where it is, alongside a pen or pencil and write entries in it as you watch your puppy throughout the day.
Next to your house phone, pinned to the fridge or by the exit to your puppy’s bathroom spot is a good place to keep it, but put it wherever is best for you.
When you first get your puppy home at 8 weeks, they can barely control their bodily functions so keeping a diary isn’t perhaps that helpful but I still recommend you do so, to get yourself into the habit.
I would recommend keeping a diary every single day until you’ve determined a definite pattern and have spotted their individual ways. Up until they’re 14 weeks old is a good target.
After this, continuing with a diary every day is the best advice, although keeping one for 3 consecutive days each week will be sufficient for you to pick up on any changes as they mature.
Once your puppy is 5 to 6 months old, they will have sufficient bladder control and experience to make a schedule and diary unnecessary.
Just make sure they get access to the outside at least once every 3 hours and all will be fine.
I discussed earlier how a puppy will need regular visits to their bathroom spot, something like every 30 minutes at 8 weeks old, every 45 minutes at 10 weeks old and so on.
But every puppy is different and their progress in having longer time between needed toilet breaks will vary too.
Although your puppy’s natural progression reflects in your diary and your schedule will adjust to suit, you should purposely try to increase the time between breaks yourself if it doesn’t happen naturally.
If you don’t see a natural increase of time between eliminations, add 5 minutes to the scheduled times every 3 or 4 days to stretch out how long they can last.
If they can’t make the time, peg it back 5 minutes and try to increase the time again in a further 3 or 4 days.
You do this because as a puppy grows, the size of their bowel and bladder increases, so they will be able to hold more for longer and you want to take advantage of this.
This is also teaching them necessary bladder and bowel control.
Your aim is to have them needing a toilet break only every 4 hours or so by the time they’re 5 to 6 months old.
In an ideal world, when you take your puppy to potty they will empty themselves completely and instantly, with no delay and not holding any back to release as soon as they’re back in your home.
There are a few things you can do and some that you certainly shouldn’t that will help you to achieve this goal.
Use your cue word before you take them: By using your chosen cue word every time before you take them to potty, your puppy will learn what the trip is about and what they must do. This eventually leads to faster results as they know what is expected of them.
Lead your puppy to the bathroom spot on leash: This gives you the ability to keep your puppy at the bathroom spot and prevent them wandering off, getting distracted and forgetting what they are there for.
This isn’t always possible if you catch them in the act and must hurry, but for scheduled bathroom visits you should always aim to take them on leash.
Make sure you stay with them at their bathroom spot: If you have them on leash, then of course you will be. But if you don’t have them on leash, make sure you stay with them because the separation will just make your puppy anxious to get back with you and they will not potty.
Once at the bathroom spot, don’t say or do anything until they start to eliminate: Puppy’s get distracted very easily and any attention can take their mind off the job in hand. Be boring, uninteresting, and just hold your puppy’s leash until they start to go.
When they start to go, say your chosen cue word in a soft warm voice. Otherwise remain silently still until they’re finished: You need to associate your cue word with the act, but if you say it too loud and brightly, it may distract them and they won’t finish.
Similarly, any other movement or sounds like praising them too early or shuffling your feet might distract them and they might not finish what they’ve started.
If they don’t finish and completely empty themselves, they may finish inside your home and even if they don’t they will not be able to make it to the next scheduled bathroom break so an accident in the home is more likely.
When you’re sure they’ve finished, praise them like mad and reward them: You should heartily praise your puppy for going in the right place, then allow them a few minutes off leash, a couple of minutes play or a tiny (and I mean tiny!) but tasty food treat.
The praise and reward make going to potty a happy experience, tells them they’ve done right and helps them to learn more quickly.
Mix up the reward between play, time off leash and a food reward to keep them guessing, but keep the food rewards to a minimum as what goes in must come out and random feeding promotes random elimination times!
 © Depositphotos.com / c-foto
 First of all, make sure you’ve spent enough time out there.
Many people pop out, stand for 1 minute and then come back in. This isn’t enough as a puppy can only go when they need to go and they may not be ready.
Some people recommend to stay out there for 10, 15, 20 minutes, whatever it takes until they go, then praise profusely when they do. Although this advice may be sound, personally I’d rather not.
I recommend you give them 3 to 5 minutes, saying your cue word every 30 seconds or so but otherwise standing silently still just holding their leash so they cannot wander off.
If after 3 to 5 minutes they haven’t been to toilet, bring them back inside your home and then:
If using constant supervision: Set them down in your home and continue watching them to intervene in case they make moves to go in the wrong place. Take them back to their bathroom spot in 10 minutes or so.
If using a crate for house training: Pop them back in the crate and leave them for 10 minutes. Then take them back to their bathroom spot.
If using umbilical cord training: Take them back into your home and watch your puppy carefully while they’re tethered to you by leash. Take them to their bathroom spot after 10 minutes.
If paper training: If they are confined to the area that’s papered, do nothing. If not, take them away from their bathroom spot and watch them for 10 minutes before returning them to their bathroom spot.
In all cases, just remember you’ve brought them back in with a full bladder so you mustn’t take your eye off them if free in your home.
And if crate training, do not leave them in the crate too long else they may be forced to soil in there. Prevent this at all costs.
Rinse and repeat the visits to and fro like this until they do potty, then follow the next sections advice.
Between scheduled bathroom visits you should do two things:Allow some supervised free time in your home, and use your chosen house training method.
 © Depositphotos.com / ikostudio
 After returning from the bathroom spot you should grant your puppy some free time in the room where you spend most of your time, up until 20 to 25 minutes before their next scheduled bathroom visit.
By free time I mean time outside of their crate, or off leash, or out of their confinement area. Time free to roam, explore and live life.
When 10 weeks old they may need to toilet every 30 minutes, so they only get 5 to 10 minutes free time. When 12 weeks old, they may need to toilet every hour so they can get 35 to 40 minutes free time.
You allow this free time because you are of course working toward a time when they will always be free and trusted unsupervised.
To get there they need the experience, to get used to being free in your home and begin seeing it as a place they need to keep clean.
They also need social interaction and life experiences.
The best time to grant this free time is right after a bathroom visit so you’re fairly sure they’re empty and are far less likely to make a toilet mistake in your home.
The important thing to remember is:
When your puppy is free in your home in this way, you must know exactly where they are at all times and be watching them like a hawk, ready to intervene if they look like they’re about to potty where they shouldn’t.
But what are the signs a puppy is about to potty?
When supervising your puppy’s free time, the signs you need to look out for that they need to eliminate are:
The minute you see any of these signs you should take your puppy to their bathroom spot immediately. There may well be some false alarms, but better safe than sorry.
Most puppies will display one or more of these pre-elimination behaviors, but no two puppies are the same so you need to be observant and learn your own puppy’s pre-toilet rituals.
Carefully watch them and you should soon notice what body language means a wee or a poop is imminent. There will be recognizable signs.
 © Depositphotos.com / AOosthuizen
 Once your puppy has enjoyed some free time and it’s nearing 20 to 25 minutes before a scheduled potty visit, you need to switch to using your chosen house training method.
We do this because the time is fast approaching when mistakes are most likely to be made. So we might crate our puppy, or attach a leash for umbilical cord training if we’re using these techniques.
Remember, all free time is closely supervised anyway so you’re ready to react if they’re about to ‘make a mistake’, So..
If using constant supervision: Carry on as you are. Watch your puppy and be ready to react if they look like they’re about to potty. Then at their scheduled potty time, attach a leash and lead them to their bathroom spot.
If using a crate for house training: Encourage your puppy into their crate and close the door, leaving them there until their scheduled potty time and then release them, instantly attaching a leash and leading them to their bathroom spot.
If using umbilical cord training: Attach a leash and tether your puppy to you, ready to react if they make moves to eliminate. Take them to their bathroom spot at the scheduled time.
If paper training: Take your puppy to their confinement area where their papered bathroom spot is and supervise them, ready to intervene if they make moves to potty away from the paper. Encourage them to potty at their scheduled time if they don’t do so naturally.
If you catch your puppy pottying in the wrong spot, you should simply clap your hands and say a firm ‘NO!’. You don’t want to shock and scare them, just loud enough to startle and get their attention.
It’s very important you DO NOT scare them as they may become afraid to potty in front of you. Not good when you need to be there to encourage them for doing it in the right place.
When you clap and say ‘NO!’, some puppies will stop what they’re doing, but others may not.
If they do, you can pick them up and carry them, or take them by the collar and gently lead them to their bathroom spot, then encourage them to finish where they should.
But if your puppy doesn’t stop mid-flow, my advice is to accept the fact you’re too late, you didn’t recognize the signs they needed to potty (or weren’t watching them closely enough) and you should let them finish and then clean it up.
Many people recommend to pick your puppy up and take them outside even if they don’t stop. But to me this seems foolish.
Instead of a little pile or puddle, you then have a long line of wee or poop from where you caught them all the way to the bathroom spot that you then have to deep clean instead. To me this isn’t worth the extra cleaning effort.
 © Depositphotos.com / adogslifephoto
 There is nothing you can do.
You’ve missed the opportunity to correct your puppy and anything you do now your puppy will be unable to connect to the act of pottying in the wrong place.
If you get angry, shout at or punish them in any way, they might ‘look guilty’ trying to appease you, but they will have no idea what it is that’s driven you mad. They’re just trying to calm the situation.
And what sometimes happens is a puppy learns that poo on the floor is what you’re mad about, causing them to slink away to poo where it’s hidden, or worse they may even eat it so you don’t see it and get mad.
So if you stumble on a mess you didn’t catch them make, simply move them away and deep clean the area.
Then think how they were able to make such a mistake and tweak your plans so it cannot happen again. But any corrections or punishment now will be futile.
This advice applies not just to full-time workers, but also if you must occasionally leave your puppy home alone for a few hours.
Most importantly, follow all the advice in this guide so far for the times that you are home.
Supervise them, correct any mistakes, set feeding and elimination schedules and everything else I have advised. Then, what follows are your choices of what you can do to cover when you aren’t at home.
First of all, if like me you use a crate, you simply cannot leave your puppy in the crate for many hours. They’ll be forced to potty in there after a very uncomfortable time trying to hold it for as long as they possibly can.
This is very unfair on your puppy and it will destroy the crates power as a house training tool if they lose the instinct to keep it clean.
Secondly, please do your best to enlist the help of a family member, friend, neighbor or hire a dog walker to periodically pop in to visit your puppy, take them to their bathroom spot, give them some social interaction and so on.
I understand this isn’t possible for all owners, but you should strive to achieve this if possible.
Having said that, what should you do about house training when you aren’t at home:
Throughout the many articles of this guide you will have read me advising against paper training unless you’re planning on a permanent indoor bathroom spot for your dog.
But I also freely admit to using paper training myself occasionally, for the unavoidable times I have to leave my puppy home alone for a few hours.
If you have to leave your puppy home alone for any reason, usually because you work, then paper training in your absence is the only thing you can do.
You then have two options available to you:Buy and use an exercise pen, or confine your puppy to a single, puppy-proofed room.
[amazon fields=”B003XU0B62″ value=”thumb” image_size=”large” tracking_id=”labradortraininghq-20″ image_class=”ais200fr”] An exercise pen is a confinement device that looks like a crate but is much larger and has no roof. They can have any number of panels, be square, hexagonal, octagonal, L-shaped…they’re very flexible (an example 8 sided pen is in the image to the right.)
You use it to confine your puppy so you know they’re safe, as is your home and belongings from their teeth.
They’re big enough for you to paper an area inside to use as a toilet, while leaving space where you can set up your dogs bed, a water bowl and some chew toys and so on away from where they have to potty.
Initially use less than half of the confinement area for your puppy’s bedding, toys and water bowl, then paper over the remaining floor space.
As they get used to pottying on paper, reduce the area covered one sheet at a time until just a small area remains covered.
Once you know your puppy can hold their bladder for longer than they have to be left alone, remove the paper altogether.
By 16 to 20 weeks, they should be able to last the 3 or 4 hours max they will be left alone and somebody comes to exercise them and allow a bathroom break.
REMARQUE : You should get your puppy used to an exercise pen by using the same techniques as crate training, so please refer to my guide to crate training puppies
[amazon fields=”B004RL1KPC” value=”thumb” image_size=”large” tracking_id=”labradortraininghq-20″ image_class=”ais200fl”] When I’ve had to leave a puppy alone, I confine them to a paper covered area of a puppy proofed room, with a puppy pad in a holder.
Between 8 and 12 weeks (when weeing seems spontaneous), my puppy spends a fair bit of time in there and I paper train them to use puppy pads.
Most recently, the room I used was basically our dining room, though it’s never used for that purpose and is essentially bare.
Our kitchen and dining room was separated by an arch where a door used to be, with tiled flooring, making it ideal.
I used a baby gate across the arch between the kitchen and dining room, and initially covered the dining area with paper, over time reducing it to just two sheets with the puppy pad holder on top.
The dining area is completely empty, with no furniture, nothing in there. So it’s as puppy proofed as can be. But a word of warning…
If you use this option and have any furniture or anything at all in the room, it’s likely it will be scratched and chewed! Skirting boards, the corners of furniture items, anything within reach is a potential target for teeth and claws.
My girlfriend works from home, we crate trained and we had no problem finding house sitters in an evening if we needed one, so we all but had things covered. But this is something you need to be mindful of.
So I recommend using an exercise pen if you’re going to leave your puppy alone often and there’s any chance of a room being damaged.
 © Depositphotos.com / feedough
 Regardless of the method of house training you choose, some form of confinement is almost always necessary, for the times when you really cannot watch your puppy.
And there will always be a time or two so it’s best to prepare in advance.
You may have an unexpected visitor or need to visit A&E in an emergency. Whatever the reason, there just WILL be times you cannot supervise your puppy.
If you’re using a crate, you have these times covered.
But if you’re against a crate for whatever reason and have chosen to exclusively use constant supervision or umbilical cord training, you will have to invest in an exercise pen or confine your puppy to a single room and use paper training.
The essence of house training is to prevent mistakes and praise your puppy heavily when they potty in the right place.
If you cannot watch your puppy, the chances of them making a mistake go through the roof.
So even if you choose to use a constant supervision method exclusively, you will still need to confine your puppy sometimes to a paper covered area just in case.
 © Depositphotos.com / domako
 You’ll likely find your 8 week old puppy has absolutely no bladder control. I mean literally none at all.
One minute they are trotting along, the next they are leaking. No warning signs for you, not even any warning signs for them. They just don’t know it’s going to happen themselves.
It’s not their fault, it’s just their immature bodies doing what they do.
During this time it’s foolish to allow them on your living room carpets for even a second.
I recommend setting up an exercise pen with the entire area papered, or do as I do and confine them to a room with the entire area papered.
Use this time to paper train them, to get them used to weeing on paper and gradually reduce the area because you will use this method if you ever have to leave them home alone during the next 4 or 5 months.
Some time between 8 and 12 weeks, your puppy will start to show some bladder control (usually 9 to 10 weeks) and will begin to show warning signs that they’re about to potty instead of instantaneously leaking. They will sniff, circle and so on as I mentioned before.
At this point you can now move on to using your chosen house training method.
I’m not saying when 8 weeks old you don’t house train them. Do! Start encouraging them to potty in the right place from the minute you get them home.
I’m just saying that it’s very hard when you have absolutely no warning for the first few days to a couple of weeks. Just don’t get mad at your puppy, it isn’t their fault and you should expect this.
A young puppy will not be able to last through the night without needing to potty. However, similar to humans a dog’s body slows down during the night and the need to toilet is severely reduced.
So the good news is, even at 8 weeks they will be able to last 4 or so hours and you will only need to wake once during the night.

Allow your puppy no food for 3 hours and no water for 2 hours before bed. Also, make sure to take them to their bathroom spot right before you go to bed so they can empty themselves.
Then set an alarm for 4 hours after their bed time when you must get up and take them to their bathroom spot. No excuses, you simply must do this.
If you find your puppy has soiled in this time, you should set the alarm for half an hour earlier the next night (3.5 hours). Repeat until you find you’re waking before they’ve had an accident.
After a few days of not having a night-time accident, set your alarm for 15 minutes later and increase the time by 15 minutes for each successful night they do not have an accident.
The time a puppy can last over night without needing to potty increases dramatically during their first few weeks so you’ll find this is OK to do.
If you find they make a mistake one night before you wake, set the alarm back half an hour, make sure they stay dry a few days and then increase 15 minutes nightly again.
Within a few short weeks you’ll find they can last a full 7 hours without needing a bathroom break.
And by using this schedule, you strike a good balance between a couple of inevitable accidents while stretching out the time at a good pace to lasting a full night.
It’s important that your puppy isn’t forced to eliminate in their crate as it can ruin their natural instinct to keep it clean, the very thing we take advantage of to help the house training process.
This is why I recommend if you find a mess you set the alarm for half an hour earlier, a reasonably big step back to where they’ve been successful at before.
If they soil their crate more than once in any given week, you may have to progress slower (add 15 minutes every 2 or 3 days), or perhaps sleep them in a papered exercise pen or their confinement room.
Maintaining their instinct to keep the crate clean is of utmost importance.
You should also consider consulting your vet to make sure it’s not a medical problem causing the mistakes.
When you take them out at night, say your chosen cue word, take them straight to their bathroom spot, praise them gently when they finish their business but do not reward them with anything else.
The last thing you want is to teach your puppy that during the night is a time for play or food treats!
This will come back to haunt you in a big way and result in noisy sleepless nights. You want your puppy to learn that night-time is for sleeping and for nothing else.
When the alarm goes off, collect them, take them to potty, praise with a simple, deadpan ‘Good potty! ‘ then silently take them back and return to sleep until the morning. Do nothing else.
No two puppies are the same. Some will be able to last the whole night without a potty break at 10 weeks (rarely), and some may not be able to at 15 weeks (also rarely).
But certainly by 16 weeks old your puppy will be able to last a 7 hour night without needing to potty if you do not feed them for 3 hours or provide water for 2 hours before bed time and allow them to empty themselves right before you lay down for the night.
 © Depositphotos.com / Nivens
 If you seem to be making little progress and your puppy is weeing and pooping randomly all the time, or just doesn’t seem to be developing bladder control, it could be due to medical reasons.
If you are feeding, exercising, training and playing with your puppy to a schedule, and when you look at your diary there seems to be no pattern to the times they need to potty, you should seek the advice of your vet.
Common ailments such as gastroenteritis, urinary tract infection and health issues affecting internal organs and the genitalia can lead to a dog needing to potty much more frequently, often leading to eliminating in the house.
Also, you should regularly check the firmness and consistency of their stools and if they’re too hard and dry, or soft and runny, there’s likely something wrong with their diet or a medical condition to blame. Again, seek the advice of your family vet.
You cannot successfully house train a puppy who is ill because their bodily functions will be too unpredictable. But of course if they’re ill, you want to have them back to good health anyway!
The simple answer is:‘When your puppy’s proven that they know to never soil inside your home.’
The average will be between 6 and 7 months old. The élite few may be some weeks earlier and yet others, particularly the smaller breeds, may take from 8 to 10 months. But 6 to 7 months is the ball park figure to aim for.
However, you have to be careful here and can’t judge it by a clock or calendar, you have to judge it by your puppy’s behavior and only stop when they have proven you can trust them.
A single mistake in the home can cause a major setback.
A puppy may not make a mistake for 2 weeks, then you give them too much freedom, they make a mistake and all of a sudden they are regularly trying to potty in the home again.
Also, some puppies just seem to forget everything for a few days now and then while growing up, even after being perfect for a couple of weeks.
Please remember this, expect it even, because it’s perfectly normal and you shouldn’t get worried or think your dog is being naughty. Just stick to your plan and they WILL eventually get it.
So anyway, it’s in your best interests to show caution and not be too hasty to end the house training process.
My advice would be to continue until they haven’t even attempted to make a mistake for at least 6 weeks so you can be sure they really have ‘got it ‘.
With house training, the fewer mistakes you allow your puppy to make and the more they are rewarded for doing the right thing, the quicker they will learn and the faster you will find success.
Because of this, the more effort you put in and the more time you spend with your puppy at the beginning – supervising to correct mistakes and taking them to their bathroom spot many times each day – the better.
But there are many other things you can do to help yourself and your puppy to find success. Setting up routines and schedules, controlling your puppy’s diet, understanding your puppy’s capabilities at different ages, working with their natural instincts and more besides.
This guide has provided you with all the theory, strategies, tips and tricks you will ever need to successfully house train your puppy as quickly and efficiently as possible, with the fewest mistakes along the way.
Put into practice what you’ve read within this guide and with a little patience and dedication you will be able to turn any puppy into a house training champion.
This was part 11 in a 12-part series where I’ve tried to provide all the guidance you could possibly ever need and covered everything I can think of for you to successfully house train your puppy or adult dog.
Veuillez consulter l'intégralité de la série liée ci-dessous :
This guide has taken me many weeks to put together so I’m hoping it will prove useful to people.
I would love to hear any feedback you have whether good or bad, so I can improve the guide over time and make sure it’s as useful as can be.
If you have any feedback, comments, questions or suggestions on how to house train a puppy, please add them to the comment section below and I will answer every one. Thank you :-)
For an entire website dedicated to House Training:www.TheHouseBreakingBible.com
For many example schedules for puppies of different ages, see:Housetraining from ‘The Academy’, Canada.
For a nice, detailed guide with some further tips and advice, see:How To Potty Train A Puppy, from ‘Fido Savvy’
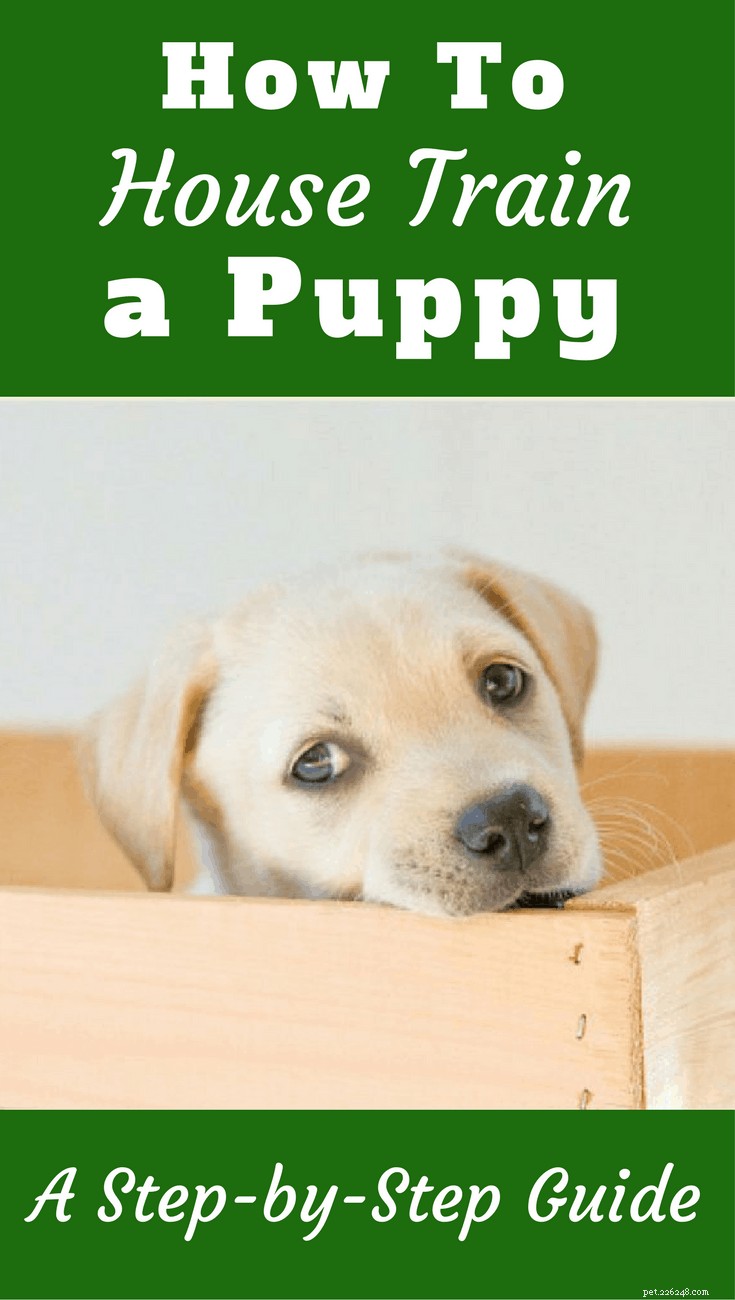
Pour une liste de toutes les fournitures que nous obtenons pour nos nouveaux chiots chiens d'assistance, consultez notre liste de contrôle pour les nouveaux chiots sur le blog PuppyInTraining.com.
